




- A proper at-home facial follows a real sequence: cleanse, exfoliate, steam, mask, moisturise.
- Steaming opens pores, softens blackheads, and boosts circulation for a genuine healthy glow, not just a spa-like feeling.
- Exfoliate before steaming, not after, so steam can further soften already-exfoliated skin.
- A full facial, done properly, takes 45 minutes to an hour; rushing reduces each step's effect.
- Once a week is generally the right frequency; more can over-strip the skin barrier.
- Match your mask to your main concern: clarifying, hydrating, or brightening.
A good facial does not need a spa appointment. Done in the right order, with the right amount of time given to each step, an at-home facial can deliver a genuine glow, deeper cleansing, and visibly smoother skin. Most people who feel their DIY facial "does not do much" are simply skipping steps or rushing through them, particularly steaming and masking, which need real time to work. Think of this as a multi-stage process where each step prepares the skin for the next, rather than a set of independent options to pick and choose from. Understanding the reasoning behind each step also makes it far easier to troubleshoot when results feel underwhelming, since the cause is usually a specific skipped or shortened step rather than the overall method failing.
This guide walks through the correct sequence, why each step matters, and how to adapt it to your skin type. You will find it mapped to real products along the way, from the Papaya facial kit to the wider facial kit collection. As a herbal skincare brand, Oshea's formulation approach is described on our About page. You will also find complementary options across the skincare collection and the face wash collection.
1. Why the Order of Steps Matters
Cleansing helps remove the top layer of oils and impurities on your skin so that the exfoliators can genuinely penetrate and be effective, as explained by Nava Greenfield, M.D., a New York City-based dermatologist, in this dermatologist-informed guide to at-home facials. Each step genuinely builds on the one before it, which is why skipping ahead, going straight to a mask without cleansing or exfoliating first, gives a noticeably weaker result. This is not a marketing distinction meant to sell more products; it reflects how skin actually responds at each stage, and it is the reason estheticians follow the same basic sequence in a professional treatment room that this guide lays out for home use.
Understanding why each step exists also makes it easier to adapt the routine sensibly. If you are short on time, it is far better to do fewer steps well, a proper cleanse, a good steam, and a mask, than to rush through all five and shortchange every single one. A facial genuinely rewards patience more than most other skincare habits, and this is one of the few skincare steps where speed genuinely works against the result rather than simply being a matter of preference.
Think of an at-home facial as a five-step relay, not five separate options. Each step hands off to the next, and skipping one weakens everything that follows it, which is exactly why a rushed facial often disappoints even when every product used was genuinely good quality.
2. Step 1: Cleanse
This first step is what dermatologists point to as the true foundation of any facial, since virtually everything after it depends on starting with genuinely clean skin.
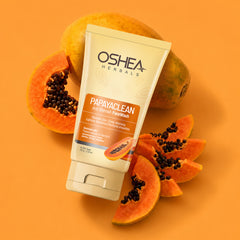
Start by removing all makeup and giving skin a thorough cleanse, massaging in circular motions for at least 60 seconds to lift daily grime, pollutants and makeup residue that clog pores. Use the PapayaClean face wash or the Almondfine face wash for a gentler alternative suited to sensitive skin, and always rinse with lukewarm rather than hot water to avoid stripping the skin before the facial has even properly begun.
3. Step 2: Exfoliate
Exfoliation is where a facial starts to genuinely differ from a normal daily cleanse, going a step further to lift away what regular washing leaves behind, and this is precisely the step most people either skip entirely or do too aggressively.
Exfoliation removes dead skin cells that cause dullness and also allows the products that follow to penetrate more effectively. Sensitive skin does better with a gentle chemical exfoliant, while tougher, more resilient skin can generally handle a physical scrub. Try the PapayaClean scrub or the Activated Charcoal face scrub combo, focusing gently on congestion-prone areas like the nose and chin, and never scrubbing hard enough to cause visible redness or discomfort.
Also Read: Papaya facial kit routine at home
4. Step 3: Steam
Steaming is the step most often rushed or skipped entirely, and it is also, somewhat ironically, the one that makes the single biggest difference to how well the mask afterward actually performs.
Steaming opens pores, softens blackheads, and helps loosen built-up dirt for a deeper cleanse, while also promoting circulation that nourishes skin and delivers oxygen for a natural, healthy glow, as detailed in this medically reviewed overview of facial steaming benefits. Hover your face over a bowl of hot water with a towel draped over your head for about 5 to 10 minutes, keeping a safe distance to avoid burns. Steaming also helps release acne-causing bacteria and dead skin cells trapped in congested pores, which is part of why it earns its place as a dedicated step rather than something to skip when short on time, as noted in this step-by-step at-home facial routine guide.
"Steaming your face opens the pores, softens blackheads and can break up dirt and bacteria that has built up on the skin. It also promotes circulation, hydrates and softens the skin," notes Dr. Marina Peredo, a triple-board certified dermatologist, in this dermatologist-reviewed explanation of facial steaming. Pairing this step with the Tea Tree fresh skin toner afterward can help further calm skin that runs oily or blemish-prone.
Steam also helps release acne-causing bacteria and trapped sebum from congested pores, which is part of why steaming before a mask genuinely improves how well the mask can work. This same softening effect is also why professional facials almost always include a steaming stage before any extractions are attempted, since skin that has not been steamed resists this kind of deeper work far more.
5. Step 4: Mask
The mask is often the part people look forward to most, and with skin properly prepared by the steps that come before it, it is also where a facial does its most visible, genuinely satisfying work.
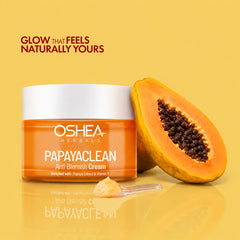
With pores open and skin freshly exfoliated, this is when a mask does its most effective work. Choose one matched to your main concern; the PapayaClean anti-blemish face pack suits oily or blemish-prone skin well, while the Glopure lightening face pack works better for dullness or uneven tone. Leave on for the time specified on the product, usually 10 to 15 minutes, resisting the urge to rinse early even if the mask starts to feel dry or tight on the skin.
Everything you need for a proper at-home facial, in one kit
Discover facial kits built around the real steps: cleanse, exfoliate, and mask.
Shop Facial Kits6. Step 5: Tone and Moisturise
The final step is easy to rush through since the exciting part, the mask, has already happened, but skipping or shortening it undoes some of what the rest of the facial just achieved for the skin.
Rinse the mask off with lukewarm water, then follow with a toner such as the Rose Fresh skin toner to rebalance skin, and finish with a suitable moisturiser such as the Phytolight day cream to lock in everything the facial just did. Skin will feel noticeably smoother and look brighter immediately after this final step, and that improvement tends to hold for several days afterward with normal daily care in between.
7. Choosing a Facial for Your Skin Type
Not every facial kit is built for the same skin concern, and matching the kit to your actual needs makes a real difference in the result, rather than simply picking whichever one looks the most luxurious on the shelf.
| Skin type | Kit recommendation |
|---|---|
| Oily or acne-prone | Papaya facial kit for clarifying, oil-balancing care |
| Dull or tired | Gold facial kit for brightening and radiance |
| Ageing or fine lines | Diamond facial kit for firming, anti-ageing support |
| Sensitive | Pearl facial kit for gentle, soothing care |
| Mixed or combination concerns | Fruitmix facial kit for a broader, balanced approach |
Explore the Gold facial kit, the Diamond facial kit, and the Pearl facial kit for options matched to different needs, or the Platinum anti-blemish facial kit for a stronger blemish-focused option.
Also Read: Diamond vs gold vs platinum facial kit
8. Common Mistakes
Most of the disappointment people feel with at-home facials traces back to one of a small handful of avoidable habits, rather than the method itself being genuinely ineffective.
- Skipping cleansing before exfoliating, which leaves surface debris in the way.
- Steaming for too short a time, not giving pores enough time to genuinely open.
- Over-exfoliating, especially right before steaming, which can irritate skin.
- Rushing the mask step, rinsing it off before it has had time to work.
- Skipping moisturiser at the end, undoing some of the hydration benefit just gained.
- Using water that is too hot, whether for steaming or rinsing, which can strip rather than support the skin barrier.
9. Results, Timeline and Best Practices
An at-home facial delivers some benefits immediately and others only with consistent, genuine weekly practice over time, so it helps to know what to realistically expect at each stage.
| What you are after | When to expect it |
|---|---|
| Immediate glow and smoothness | Right after the facial, visible the same day |
| Reduced congestion, fewer visible blackheads | 2 to 3 weekly facials |
| Overall clearer, more even skin | 4 to 6 weeks of weekly consistency |
Best practices
- Follow the full sequence in order; do not skip steps to save time.
- Once weekly is generally enough; more can irritate skin. Estheticians and avid spa-goers understand this rhythm well, which is part of why weekly is the standard recommendation even outside a professional setting, as noted in this guide to doing a proper at-home steam facial.
- Patch test any new mask or exfoliant before full-face use.
- Pair your facial with a consistent daily routine. See the 5-minute morning skincare routine for the days in between.
10. Who Should Adjust the Routine?
The five-step framework works for nearly everyone, but small adjustments to timing and product choice matter for certain skin types and situations, and knowing which adjustment applies to you saves a lot of trial and error.
- Sensitive skin: shorten steaming time and choose a calming, gentle mask. See the sensitive skin collection.
- Acne-prone skin: a clarifying mask and gentle chemical exfoliant work best. See the acne collection.
- Dry skin: extend the moisturising step and consider a hydrating mask.
- Busy schedules: a shorter routine focused on cleanse, mask and moisturise still adds real value.
11. Related Reading
These related articles and products round out a complete facial care routine beyond just the five core steps covered above.
Key Takeaways
- Follow the actual real sequence: cleanse, exfoliate, steam, mask, tone and moisturise, in that exact order.
- Steaming genuinely opens pores and boosts circulation; do not skip or rush it, no matter how short on time you are.
- Exfoliate before steaming, never after, for the best combined effect on the skin.
- A full facial takes 45 minutes to an hour done properly; once weekly is generally enough for most skin types.
- Match your mask and kit to your skin type for the most noticeable, satisfying results.
12. Frequently Asked Questions
A few final practical questions come up often enough about doing facials at home that they are worth answering directly here.
What is the correct order of steps for an at-home facial?
The general sequence is cleanse, exfoliate, steam, mask, and moisturise, sometimes with a toner and serum added between steaming and masking. Each step prepares the skin for the next, so cleansing removes surface impurities before exfoliation, and steaming opens pores before a mask is applied for deeper absorption.
Is facial steaming actually beneficial?
Yes. Steaming opens pores, softens blackheads, and helps loosen built-up dirt for a deeper cleanse. It also promotes circulation, which nourishes skin and delivers oxygen, giving a natural, healthy glow, according to dermatology-reviewed sources on facial steaming benefits.
How long should an at-home facial take?
A complete facial, done properly rather than rushed, typically takes 45 minutes to an hour, including cleansing, exfoliating, 5 to 10 minutes of steaming, and 10 to 15 minutes with a mask on. Rushing through the steps, especially steaming and masking, reduces how effective they are.
How often should I do a facial at home?
Once a week is a good general frequency for most skin types. Doing it more often, especially the exfoliation and steaming steps, can over-strip the skin barrier and cause irritation rather than the intended glow.
Should I exfoliate before or after steaming?
Exfoliate before steaming. Gentle exfoliation removes surface dead skin cells first, and steaming afterward further softens the skin and opens pores, making the mask that follows more effective at penetrating and delivering its ingredients.
Can I do a facial at home if I have sensitive or acne-prone skin?
Yes, but choose gentler versions of each step: a mild chemical exfoliant instead of a harsh physical scrub, shorter steaming time, and a calming rather than a stimulating mask. Always patch test any new product before using it on your full face.
What should I use for the mask step?
Choose a mask suited to your main concern: clarifying for oily or acne-prone skin, hydrating for dry skin, and brightening for dullness or uneven tone. A facial kit that includes a matched mask makes this step easier to get right without extra guesswork.
Is a DIY facial as effective as a professional one?
A consistent at-home facial routine delivers real, visible benefits for maintenance between professional treatments, though it will not fully replace the extractions, machines, and trained technique a professional facial offers. For regular upkeep and a genuine at-home glow, a well done DIY facial is a solid, effective option.


